Honeywell dehumidifiers are known for efficient moisture removal and energy-saving designs. Models like TP70 and TP50AWKN include detailed manuals for setup, operation, and troubleshooting, ensuring optimal performance and ENERGY STAR certified efficiency.
1.1 Overview of Honeywell Dehumidifier Models
Honeywell offers a range of dehumidifier models, including TP70, TP50AWKN, and DR65A3000, each designed for efficient moisture removal. These models vary in capacity and features, ensuring suitability for different spaces. The TP70 is a high-capacity option, while TP50AWKN is known for energy efficiency. Manuals for these models provide detailed setup, operation, and troubleshooting guides. Advanced features like smart WiFi control and continuous drainage options are available in select models, enhancing convenience. Each Honeywell dehumidifier is accompanied by a user manual, ensuring users can optimize performance and maintain their units effectively.
1.2 Importance of Using a Dehumidifier Manual
Using a Honeywell dehumidifier manual is crucial for safe and effective operation. It provides essential safety warnings, setup instructions, and maintenance tips. The manual helps users understand features like humidity controls and drainage systems. Troubleshooting guides address common issues, reducing downtime. Proper usage ensures optimal performance and extends the unit’s lifespan. By following the manual, users can avoid potential hazards and maintain efficiency. It serves as a comprehensive resource for maximizing the benefits of your Honeywell dehumidifier while ensuring safety and reliability in everyday use.
Safety Rules and Precautions
Always read and follow the manual’s safety instructions. Keep children away, avoid damaged units, and ensure proper electrical connections to prevent hazards and ensure safe operation.
2.1 General Safety Warnings
Important: Always read and follow the safety instructions in the Honeywell dehumidifier manual. Keep children away from the appliance and its packaging. Do not allow children to play with the unit or its components. If the dehumidifier is damaged or malfunctions, stop using it immediately and unplug it from the power source. Regularly inspect the power cord and plug for damage. Ensure proper ventilation and avoid placing the unit near flammable materials. The dehumidifier is designed for indoor use only and should not be exposed to outdoor weather conditions. Operating the unit outside its recommended temperature range (41°F to 89°F) may reduce performance and safety. Always drain collected water promptly, as it is not suitable for drinking. Failure to follow these guidelines may result in injury, fire, or damage to the unit;
2.2 Specific Precautions for Honeywell Dehumidifiers
Before using your Honeywell dehumidifier, ensure it stands upright for at least 1 hour after transportation to allow refrigerant stabilization. If tilted during shipping, wait 4 hours. Avoid placing the unit near curtains or furniture that may obstruct airflow. Maintain a distance of at least 17.7 inches from other objects. Do not modify or tamper with the dehumidifier’s components, as this may void the warranty. Always unplug the unit before cleaning or performing maintenance. Check the water tank regularly to prevent overflow and ensure proper drainage. For models with continuous drainage, secure the tube connections to avoid leaks. Adhere to these precautions to ensure safe and efficient operation.
How a Dehumidifier Works
A dehumidifier removes moisture by drawing damp air over cooling coils, condensing water vapor into droplets collected in a tank, and circulating dry air back into the room.
3.1 Basic Principles of Dehumidification
A dehumidifier operates by drawing moisture-laden air into the unit using a fan. This air passes over cooling coils, which condense the water vapor into droplets. These droplets collect in a water tank or are drained continuously. The dehumidifier then releases dry, warm air back into the room, effectively reducing humidity levels. This process ensures a more comfortable environment by eliminating excess moisture, which can prevent mold growth and musty odors. Proper operation requires the unit to be upright for at least an hour before use to allow the refrigerant to stabilize, ensuring optimal performance and efficiency.
3.2 Components of a Honeywell Dehumidifier
A Honeywell dehumidifier consists of key components designed for efficient operation. The control panel features a display screen, humidity controls, and function buttons for settings. A washable dust filter ensures clean airflow, while the water tank collects condensed moisture. Continuous drainage options include a drain tube and auto-drain pump for models like TP55PN. Mounting holes and a cord winder facilitate installation. The unit also has a splash guard and float mechanism to prevent water overflow. These components work together to remove moisture effectively, maintain air quality, and provide a user-friendly experience for managing humidity levels in various spaces.
Installation and Setup
Proper installation ensures optimal performance. Unpack and inspect the unit, then place it upright for 1-4 hours. Choose a well-ventilated area, install the cord winder, and set up drainage systems as needed.
4.1 Unpacking and Initial Inspection
Before setup, carefully unpack your Honeywell dehumidifier and inspect for damage. Remove packaging tape and ensure all components are included, such as the water tank, splash guard, and continuous drain tube. Gently pull out the water tank and check for any shipping-related issues. Allow the unit to stand upright for 1-4 hours after transportation to let the refrigerant stabilize. This step is crucial to ensure proper functionality. Inspect the cord winder and mounting holes for secure installation. Once unpacked, verify all parts are intact and ready for installation. Proper inspection ensures safe and effective operation from the start.
4.2 Choosing the Right Location for Your Dehumidifier
To ensure optimal performance, place your Honeywell dehumidifier in an area with a consistent temperature between 41°F (5°C) and 89°F (32°C). Avoid locations near curtains or furniture that may block airflow. Position the unit at least 17.7 inches (45 cm) away from other objects to maintain proper air circulation. For continuous drainage, locate it near a drain or sink. Ensure the dehumidifier is upright and stable to prevent leaks. Avoid placing it in direct sunlight or humid areas like bathrooms. Proper placement enhances efficiency, safety, and effectiveness in reducing moisture.
4.3 Installing the Cord Winder and Drainage System
Begin by unpacking the cord winder accessories from the water tank. Align the winder pieces with the mounting holes and rotate them 45 degrees clockwise until they click into place. For the drainage system, attach the continuous water drain tube to the outlet and position the other end in a nearby sink or drain. Ensure all connections are secure to prevent leaks. If using the auto drain pump, activate it by pressing the indicator button. Proper installation ensures smooth operation and efficient water drainage, preventing overflow and maintaining the dehumidifier’s performance.
Operating the Dehumidifier
Turn on the dehumidifier, set your desired humidity level using the control panel, and let it run. Ensure the unit is upright and placed in a well-ventilated area.
5.1 Control Panel Overview
The Honeywell dehumidifier’s control panel features a user-friendly interface with a display screen, power controls, humidity settings, timer functions, and fan speed options. The LED display shows current humidity levels and operational status. Buttons allow adjustments for moisture levels, timer settings, and fan speed. The control panel also includes indicators for water tank status and filter alerts. For models with advanced features, additional controls for modes like Sleep Mode or Continuous Drainage are available. The panel is designed for intuitive operation, ensuring easy management of dehumidification settings and monitoring of the unit’s performance efficiently.
5.2 Setting Up the Humidity Level and Timer
To set the humidity level, press the humidity control buttons on the control panel to adjust the target percentage in 5% increments. The display screen will show the selected humidity level. For the timer, press the timer control buttons to set the dehumidifier to operate for a specific duration, ranging from 0.5 to 24 hours. Ensure the unit is powered on before setting the timer. Once set, the dehumidifier will automatically turn on or off at the designated time. This feature allows for convenient operation and energy management, ensuring the unit runs only when needed for optimal performance and efficiency.
5.3 Understanding the Fan Speed and Sleep Mode
The Honeywell dehumidifier offers multiple fan speed settings to customize airflow based on room conditions. Lower speeds are suitable for quieter operation, while higher speeds maximize moisture removal. The Sleep Mode reduces LED brightness and minimizes noise, ideal for nighttime use. Activate Sleep Mode by pressing the designated button, which dims the display and adjusts fan speed for a quieter environment. This feature ensures uninterrupted sleep while maintaining effective dehumidification. The unit will continue to operate in Sleep Mode until manually turned off or the desired humidity level is reached, providing a balance between performance and convenience.
Maintenance and Cleaning
Regular cleaning and maintenance ensure optimal performance. Clean the washable dust filter and check for blockages. Empty the water tank and wipe down surfaces to prevent mold growth.
6.1 Cleaning the Dehumidifier and Its Components
Regular cleaning is essential for maintaining your Honeywell dehumidifier’s efficiency and preventing mold growth. Always unplug the unit before cleaning. Wipe the exterior with a soft cloth and mild detergent. The washable dust filter should be cleaned every 1-2 months by rinsing it with warm water or vacuuming. Check the water tank for mineral deposits and clean it with a soft brush and mild detergent. For condenser coils, use a soft brush to remove dust. Ensure all components are dry before reassembling. Cleaning ensures proper airflow and prevents bacterial growth, keeping your dehumidifier running effectively.
6.2 Replacing and Cleaning the Washable Dust Filter
Regularly cleaning the washable dust filter ensures optimal performance. Locate the filter at the back or side of the unit. Turn off and unplug the dehumidifier before removal. Gently vacuum or rinse the filter with warm water to remove dust and debris. Allow it to dry completely before reinstalling. Clean the filter every 1-2 months or as indicated by the filter alert. If the filter is damaged, replace it with a compatible Honeywell part. A clean filter improves airflow, reduces energy consumption, and prevents dust from circulating in the air. Replace the filter every 3-5 years or as needed for best results.
Troubleshooting Common Issues
Troubleshooting common issues ensures optimal performance. Check power connections, water drainage, and filter cleanliness. Addressing problems early prevents further malfunctions and extends the dehumidifier’s lifespan effectively.
7.1 No Electricity or Unit Not Turning On
If your Honeywell dehumidifier has no electricity or won’t turn on, check the power cord connection. Ensure it’s properly plugged into a working outlet.
If the issue persists, inspect the circuit breaker or fuse box to confirm the circuit hasn’t tripped or blown.
Additionally, verify the safety switch is functioning correctly. If the unit is damaged or malfunctioning, unplug it immediately and contact customer support.
Refer to the troubleshooting section in the manual for detailed guidance to resolve the issue efficiently and safely.
7.2 Issues with Humidity Level and Water Drainage
If the dehumidifier isn’t maintaining the desired humidity level, ensure the settings are correct and the unit is suited for the room size.
Check for blockages in the air vents or filters, as restricted airflow can reduce efficiency. For water drainage issues, verify the drain hose is kink-free and properly connected.
If using a water tank, ensure it’s securely placed and not full, as this can halt operation.
For continuous drainage, check the drain cap and tube connections. If issues persist, consult the troubleshooting guide or contact Honeywell support for assistance.
7.3 Error Codes and Their Solutions
Honeywell dehumidifiers may display error codes like E1, E2, or E3, indicating specific issues. E1 often relates to sensor malfunctions, while E2 may signify drainage problems. E3 could indicate a communication error between components. To resolve these, restart the unit, ensure proper water tank installation, and check for blockages in the drainage system. If issues persist, refer to the error code guide in the manual or contact Honeywell customer support for professional assistance. Regular maintenance, like cleaning the filter, can also prevent such errors from occurring.
Advanced Features of Honeywell Dehumidifiers
Honeywell dehumidifiers offer smart WiFi control, continuous drainage options, and auto-drain pumps for enhanced convenience. These features ensure efficient moisture removal and seamless operation, improving air quality effortlessly.
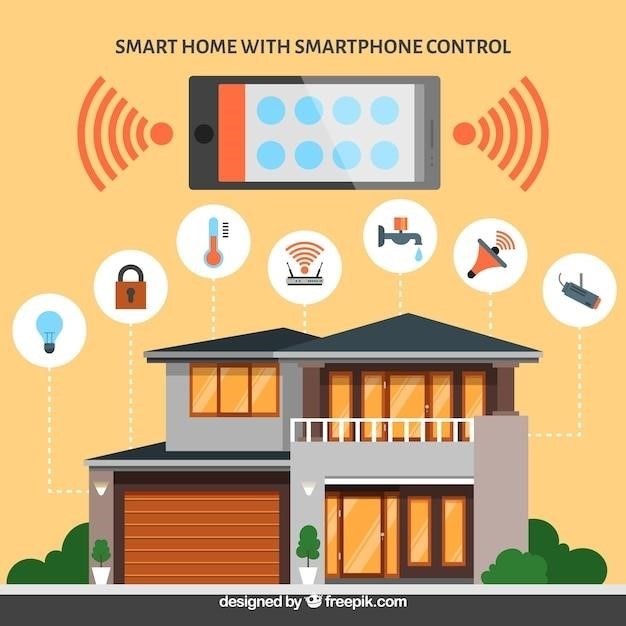
8.1 Smart Portable Dehumidifier and WiFi Control
The Honeywell Smart Portable Dehumidifier integrates WiFi connectivity, enabling remote control via the Honeywell Air Comfort App. This feature allows users to monitor humidity levels, adjust settings, and receive notifications from their smartphones or tablets. Smart voice control is also supported through compatible systems, offering hands-free operation. The app ensures seamless updates and provides a user-friendly interface for optimizing dehumidification. With this advanced technology, managing indoor humidity becomes convenient and efficient, enhancing overall comfort without constant manual adjustments. This innovation makes Honeywell dehumidifiers a standout choice for modern smart homes. Proper setup and app installation are detailed in the user manual for a smooth experience.
8.2 Continuous Drainage and Auto Drain Pump Options
Honeywell dehumidifiers offer advanced drainage solutions, including a continuous water drain tube for direct drainage into a sink or floor drain. For models like TP55PN and TP70PN, an auto drain pump is available, enabling drainage without gravity constraints, ideal for distant or elevated drain locations. This feature ensures uninterrupted operation, eliminating the need to empty the water tank manually. The pump activates with a button, while the continuous tube connects securely to prevent leaks. Regular maintenance, like tightening connections, is recommended for optimal performance. These options enhance convenience, especially in large spaces or continuous use scenarios, as detailed in the user manual.
French Manual and Instructions
The French manual provides essential instructions for Honeywell dehumidifier setup, operation, and maintenance in French, ensuring accessibility for French-speaking users with detailed guidance and safety precautions.
9.1 Règles de Sécurité et Avertissements
The French manual emphasizes critical safety rules to ensure safe operation. It advises against letting children play with the appliance or packaging and warns not to operate a damaged unit. Users must unplug the dehumidifier before cleaning or maintenance and allow it to stand upright for at least 1 hour after transportation. The manual also highlights the importance of proper ventilation and warns against restricting airflow around the unit. These guidelines are essential to prevent hazards like fire or injury, ensuring a safe and efficient dehumidification experience for French-speaking users.
9.2 Comment Fonctionne un Déshumidificateur
A dehumidifier works by drawing moisture-laden air into the unit, where it passes through cooling coils. These coils condense the moisture into water, which collects in a tank; The dry air is then expelled back into the room. For optimal performance, the unit must operate between 41°F (5°C) and 89°F (32°C). If tilted during transport, the dehumidifier should stand upright for at least 1 hour before use to allow the refrigerant to stabilize. This ensures efficient moisture removal and proper functionality. Regular maintenance, like cleaning filters, is also essential for long-term efficiency and effectiveness in reducing humidity levels.
Additional Resources
For further assistance, visit manualslib.com for Honeywell dehumidifier manuals. Explore model-specific guides, troubleshooting tips, and download user manuals for optimal performance and maintenance.
10.1 Downloading the Honeywell Dehumidifier Manual
To access Honeywell dehumidifier manuals, visit manualslib.com or Honeywell’s official website. Search for your specific model (e;g., TP70WKN or TP50WKN) and download the PDF manual for free. These guides provide detailed instructions for setup, operation, and troubleshooting. Ensure you select the correct model to get accurate information. Additional resources like troubleshooting guides and customer support contacts are also available online for further assistance. Always refer to the official sources to avoid outdated or incorrect information.
10.2 Model-Specific Guides and Troubleshooting Tips
Honeywell offers model-specific guides for dehumidifiers, such as the TP30WKN, TP50WKN, and TP70WKN, available on manualslib.com. These guides provide tailored instructions for features like smart WiFi control and continuous drainage. Troubleshooting sections address common issues, including no power, humidity level problems, and error codes. Detailed diagrams and step-by-step solutions help users resolve issues quickly. For advanced models with built-in drain pumps, specific maintenance tips ensure optimal performance. Always consult the official manual for your model to avoid generic solutions and ensure proper functionality. Regular updates and additional resources are available online for enhanced user support.